Apple introduced iMessages in June 2011 as the default messaging platform for iOS users; it's served well for Apple since then and now has millions of users. Unfortunately, iOS developers were never allowed to plug into the iMessages system and customize it according to their needs. This all changed in 2016 when Apple introduced the Messages framework in iOS 10, allowing developers to customize the look and feel of iMessages in the form of stickers and custom iMessages extensions using Swift 3.0.
Today, there are thousands of stickers and iMessages apps in the App Store and some even made it to the top ten paid apps. In this article, you're going to build couple of iMessages apps and look at the different methods and purposes for each approach.
Sticker Pack Apps
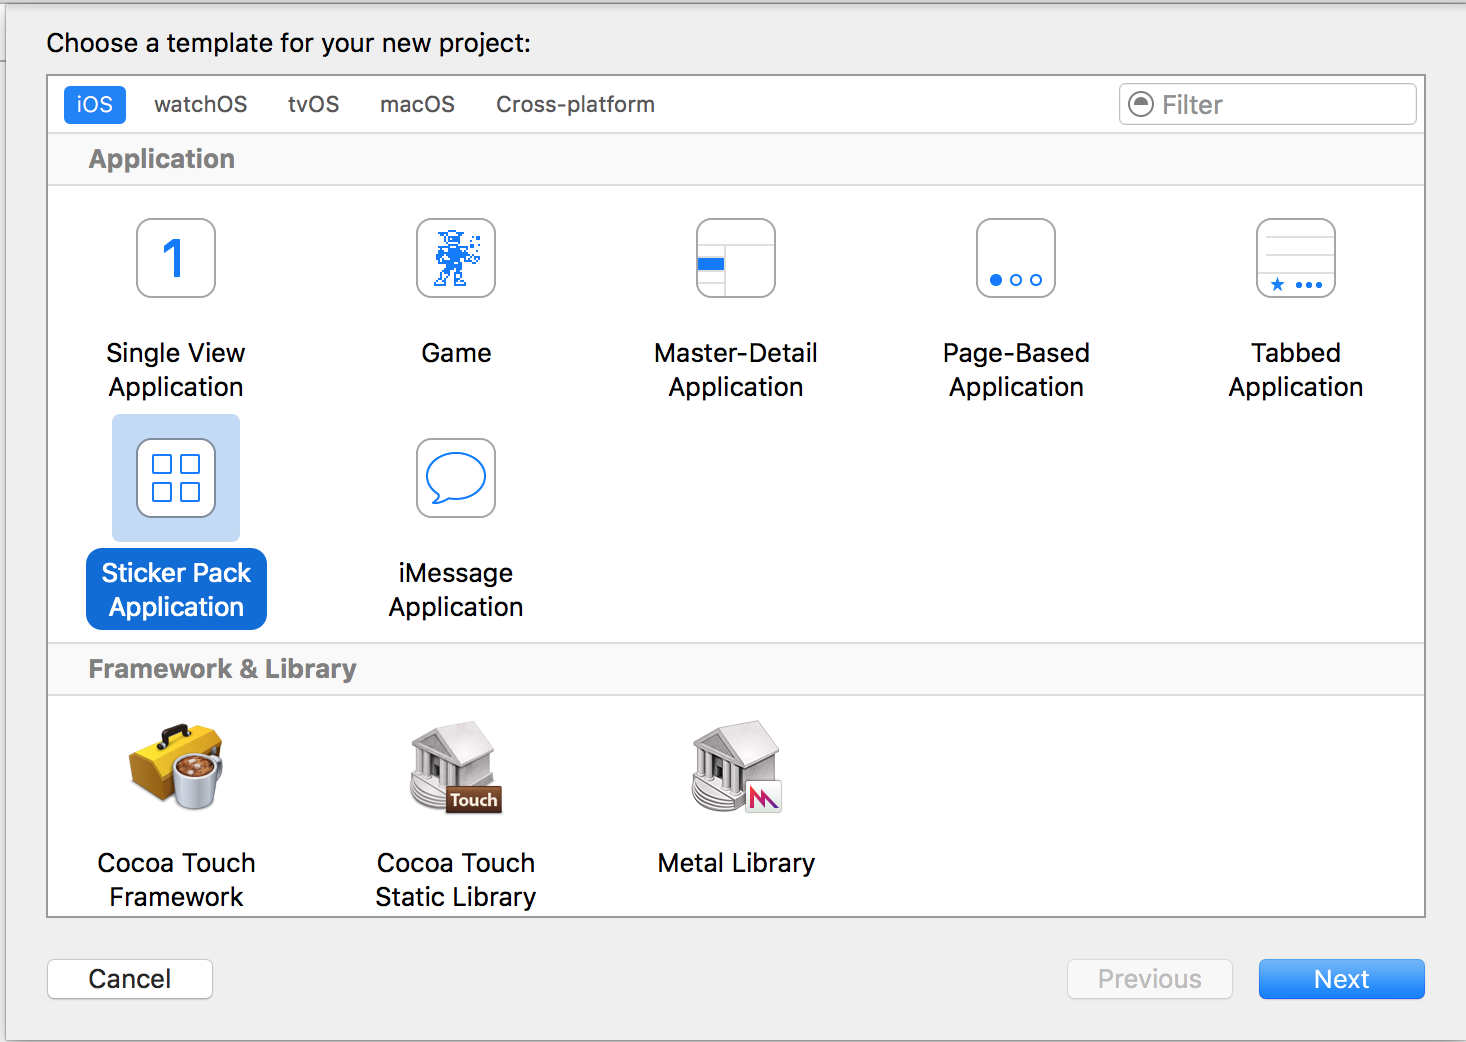
Sticker Pack Apps can be created in less than 30 seconds because they're code free, meaning that they can be developed and published without writing a single line of code. Xcode 8 provides a new template for creating Sticker Pack Applications, as shown in Figure 1.
Once you select the Sticker Pack Application template, Xcode 8 automatically creates the default starter project. An important thing to notice is that the Sticker Pack Application project doesn't contain storyboard, view controllers, or even application delegate files. That's because Sticker Pack Applications are 100% code-free.
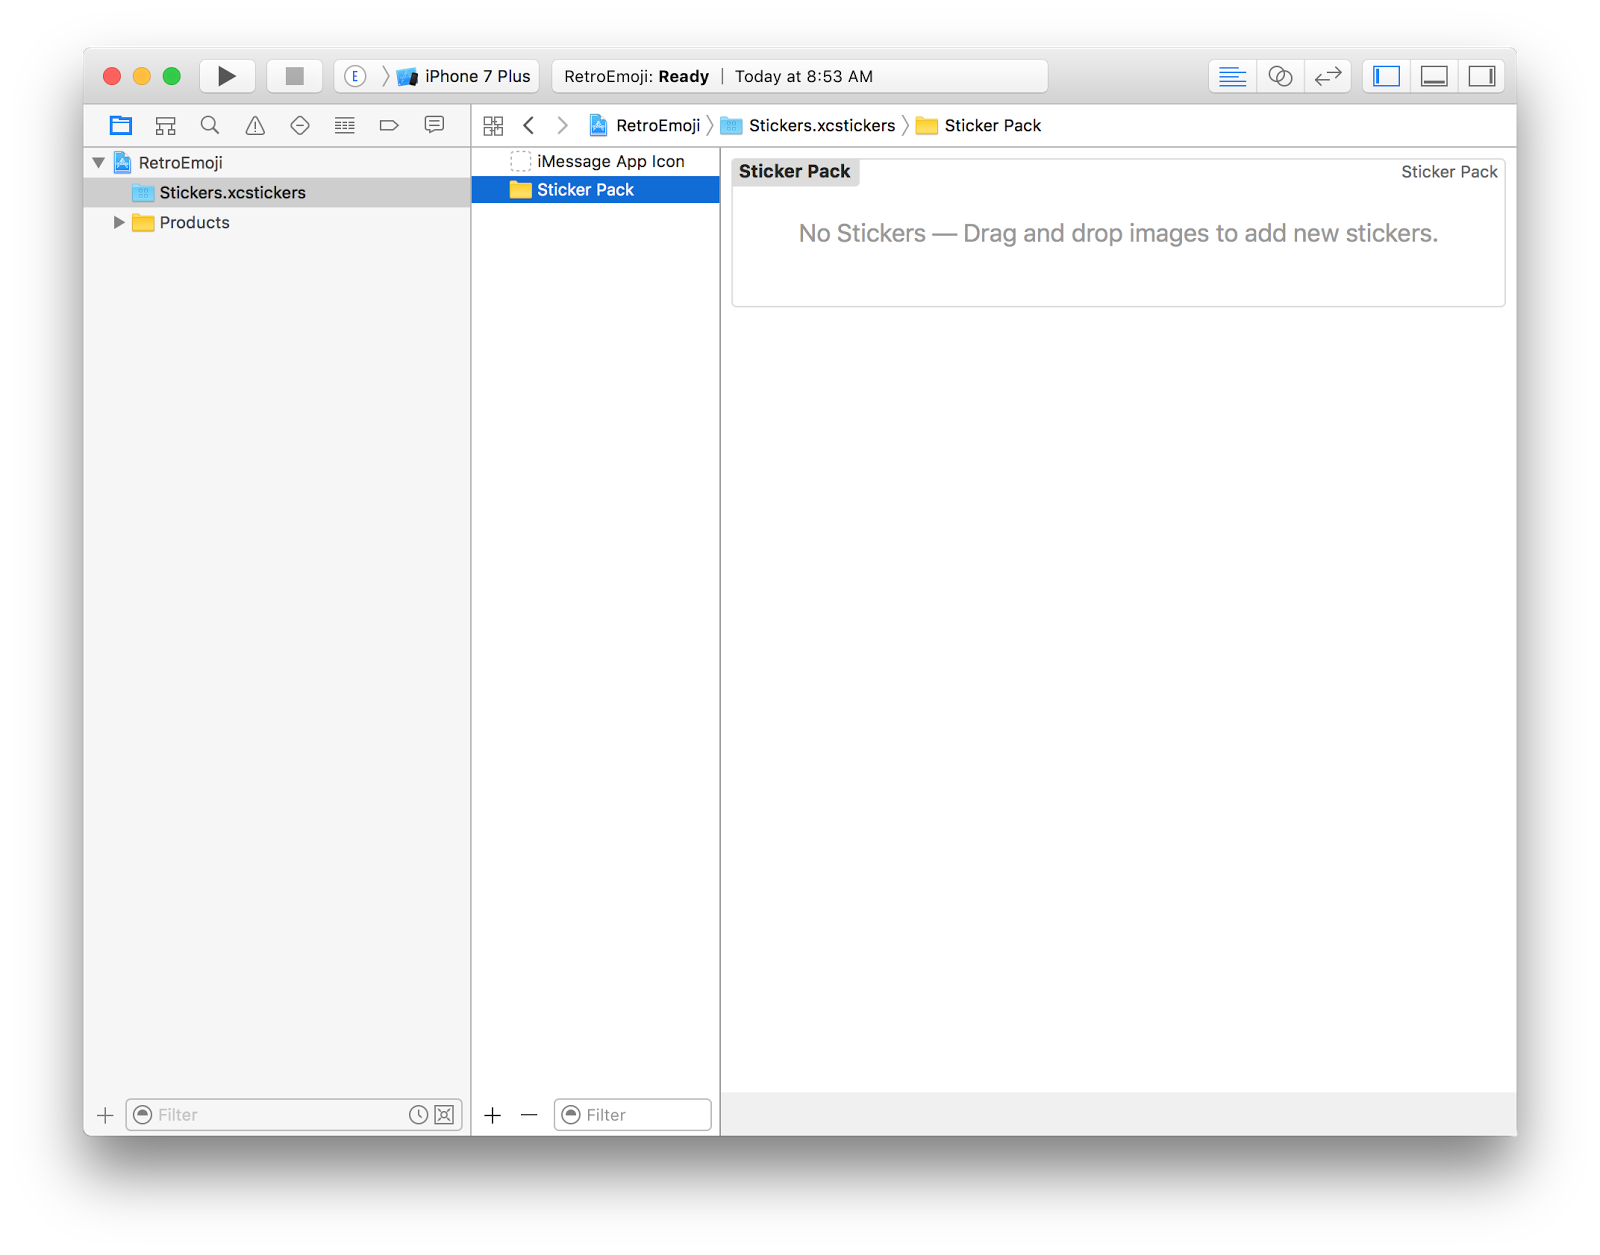
Select the Stickers.xcstickers assets and in the middle pane, select the Sticker Pack folder. This updates the right pane, which displays the number of stickers in the application. Because you haven't added any stickers to the application yet, it says No Stickers - Drag and drop images to add new stickers.
At this point, all you have to do is drag and drop the images into the designated area and you're done. I told you: This is going to take less than 30 seconds!
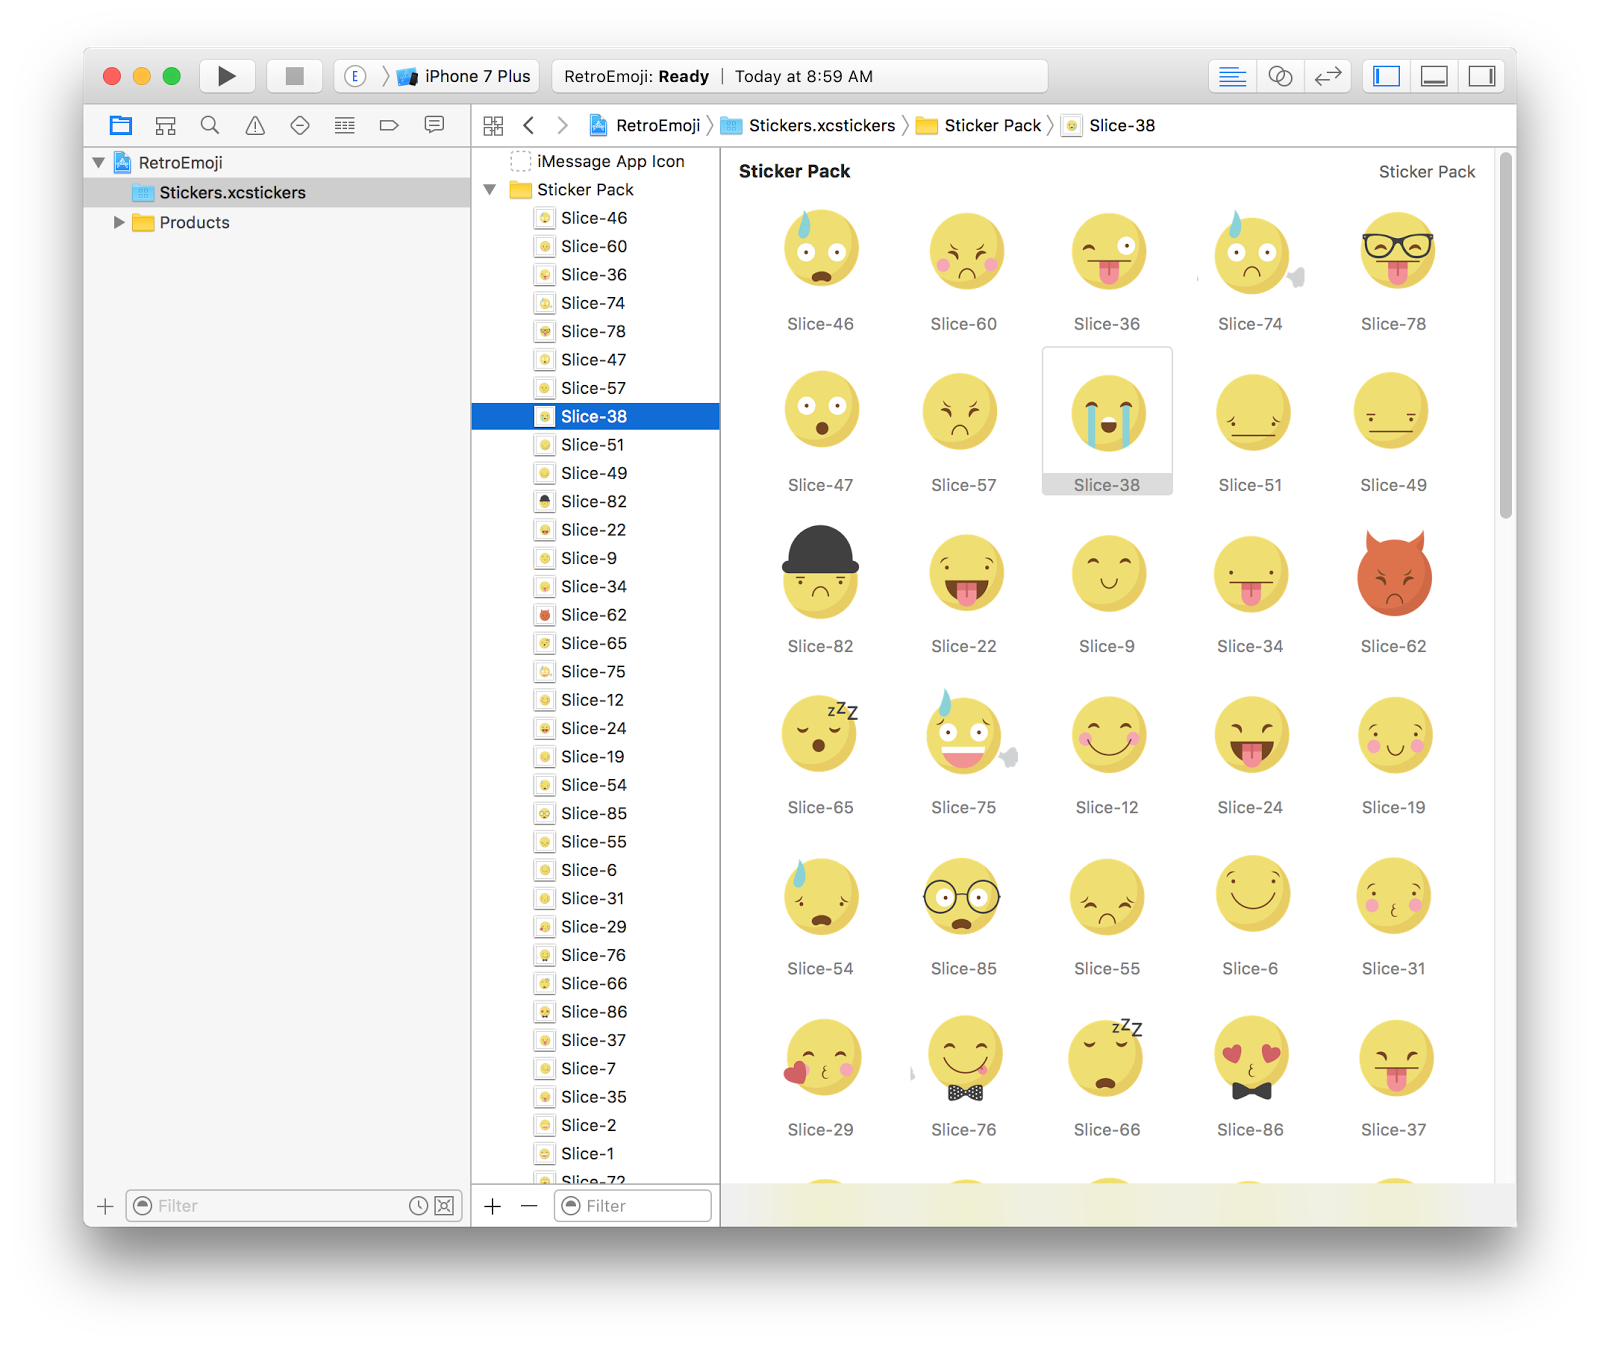
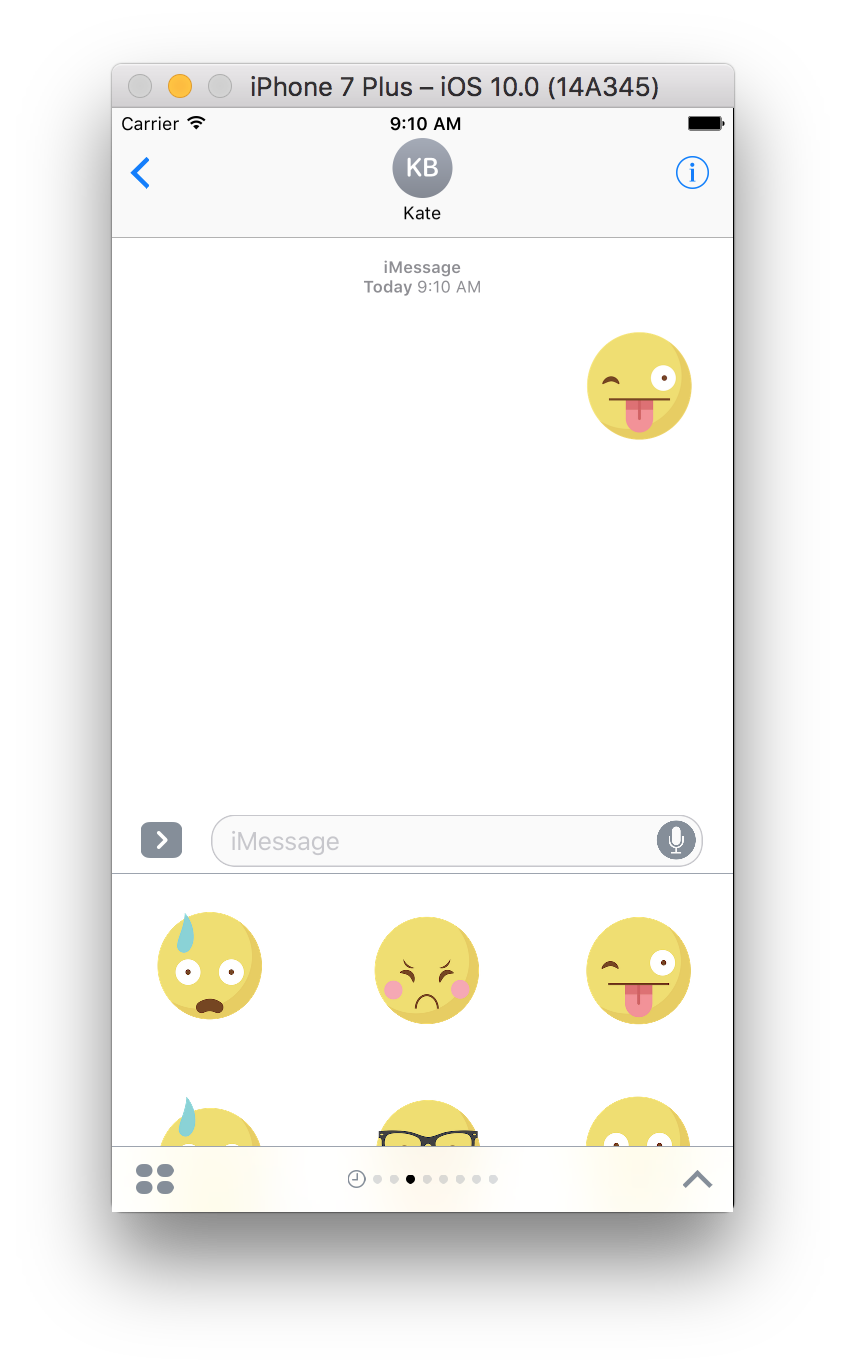
Figure 3 shows the Sticker Pack Application after I've dropped several awesome smiley face emojis into the sticker assets folder.
At this point, you're done with the app! You can run the app and witness your awesome work.
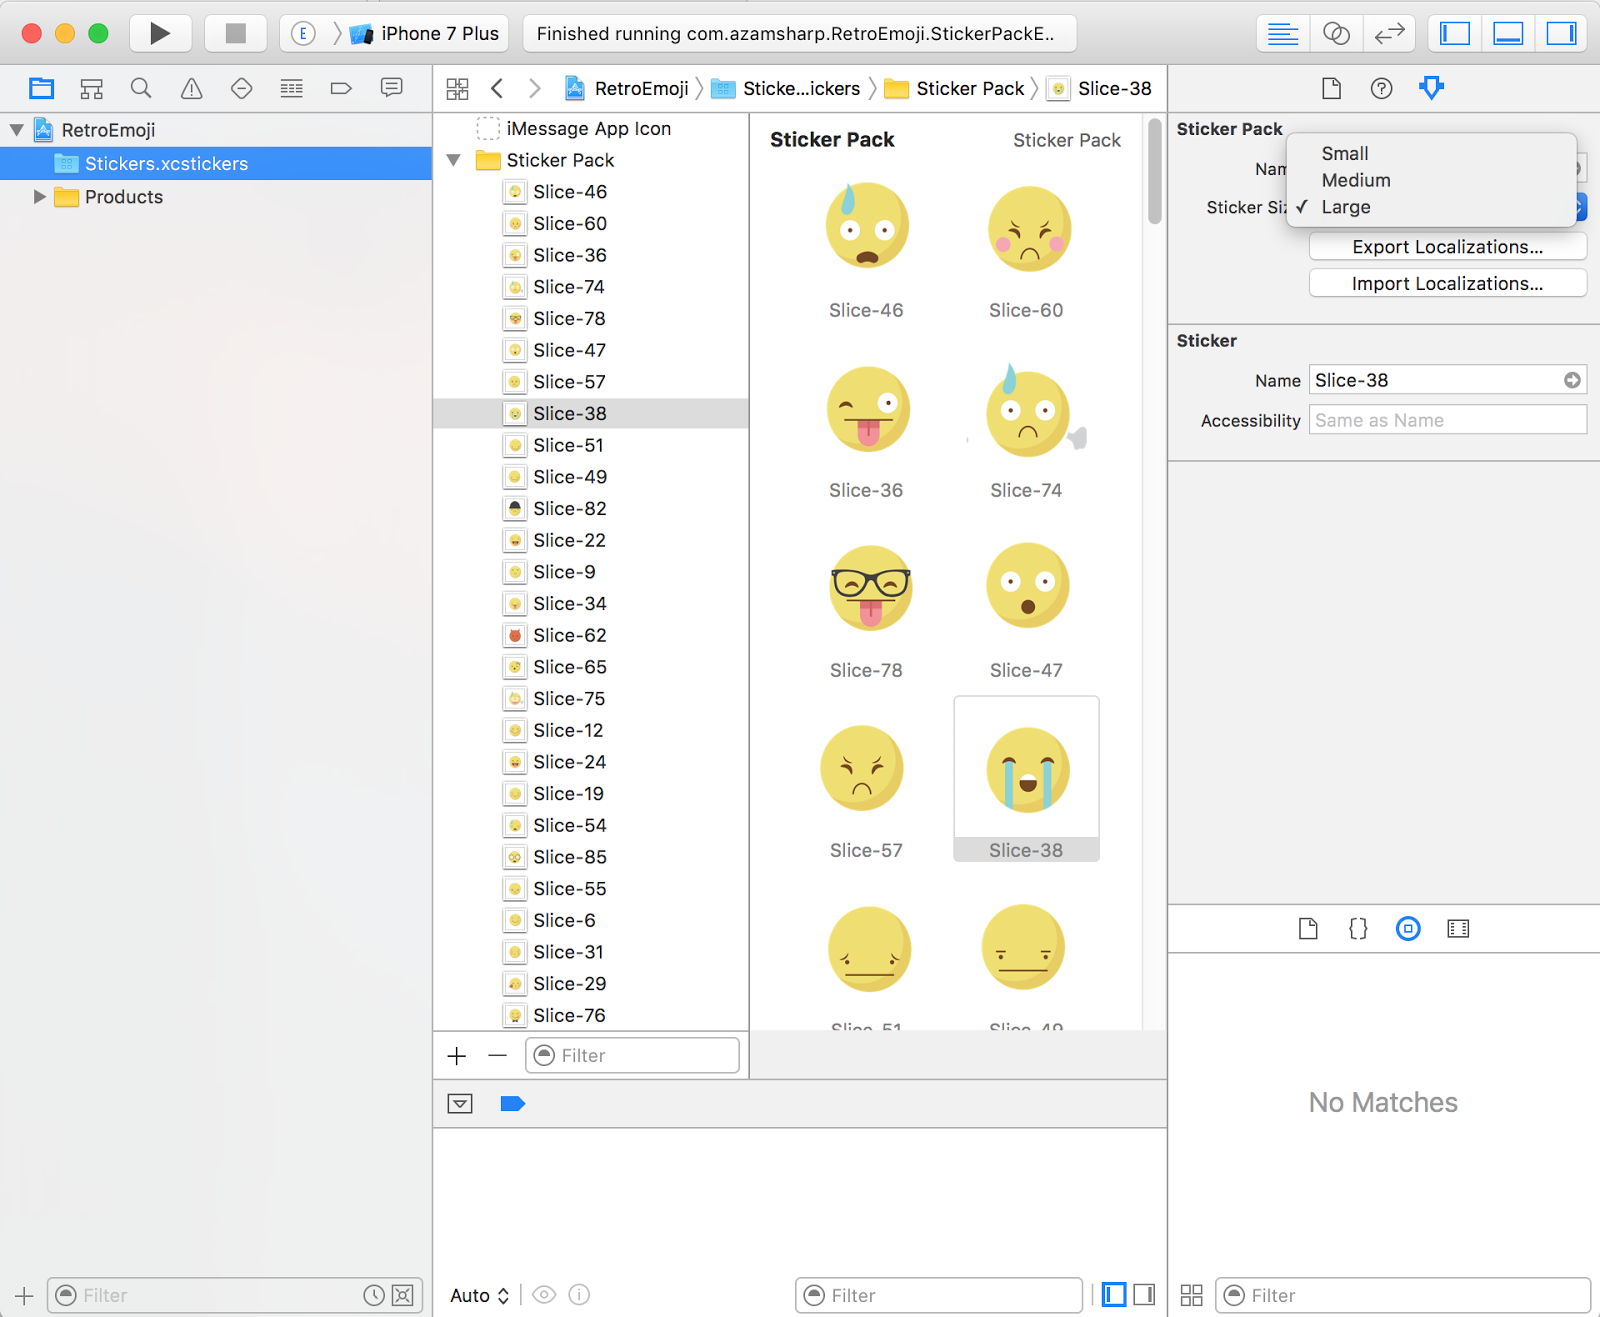
By default, the Sticker Pack Applications displays the stickers in medium sticker-size format. You can adjust the size using the attributes inspector, as shown in Figure 5.
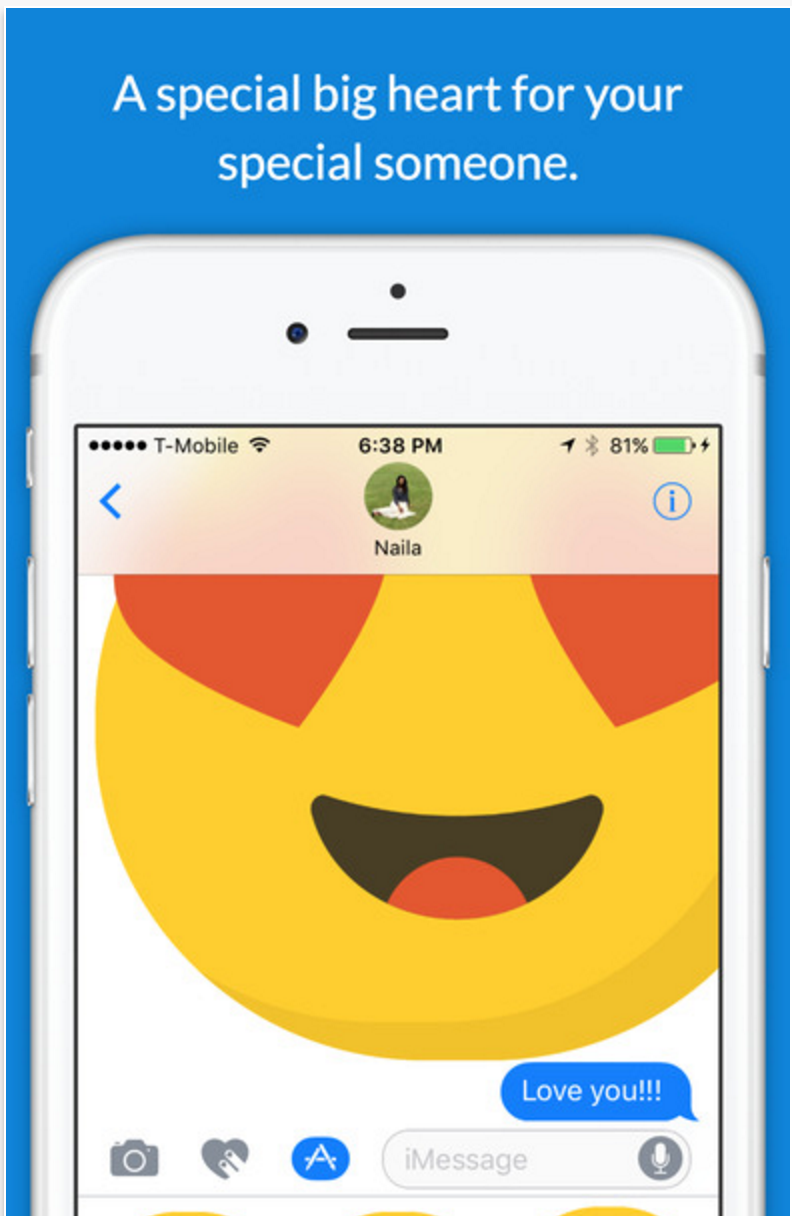
If you run the app again, you'll notice that the stickers are much bigger in size. For the larger size stickers, make sure that your stickers' dimensions are greater than 500 x 500 points. The stickers with large sizes create a very distinctive and unique effect, as shown in Figure 6.
Even though sticker applications are quick and easy to create and are great for sharing funny emojis, pictures, GIF images, etc., they're quite limited in nature. The limitation comes from the fact that sticker applications don't have any code. This means that sticker pack applications can't integrate with ad networks, in-app purchases or even transition to different screens.
Sticker Pack applications allow the designers to use their creative skills to step into the arena of app development without having to write a single line of code.
Don't feel upset that you can create the same sticker application using code. Instead of choosing the sticker pack application project template, you use the iMessages application project template. In the next section, I'll demonstrate how you can write a complete iMessages application that allows the user to keep track of RSVP confirmations.
Creating the RSVP iMessages Application
The real power of the new iOS 10 Messages framework comes from the iMessages applications. Just like sticker pack applications, iMessages applications run under the umbrella of the Messages framework app but provide a lot more flexibility for customization.
In this section, I'm going to create a very practical iMessages application for managing RSVPs. Consider a scenario where you're throwing a birthday party and you want an RSVP count for the number of guests. Instead of sending and tracking hundreds of RSVPs on your Messages app, wouldn't it be great if you could simply get the count of people who're interested in attending the event? This saves you from the headache of counting the confirmations yourself and also affects the number of pizzas you order for the party. Nobody likes to waste pizza and cake, am I right?
Messages App Presentation Styles
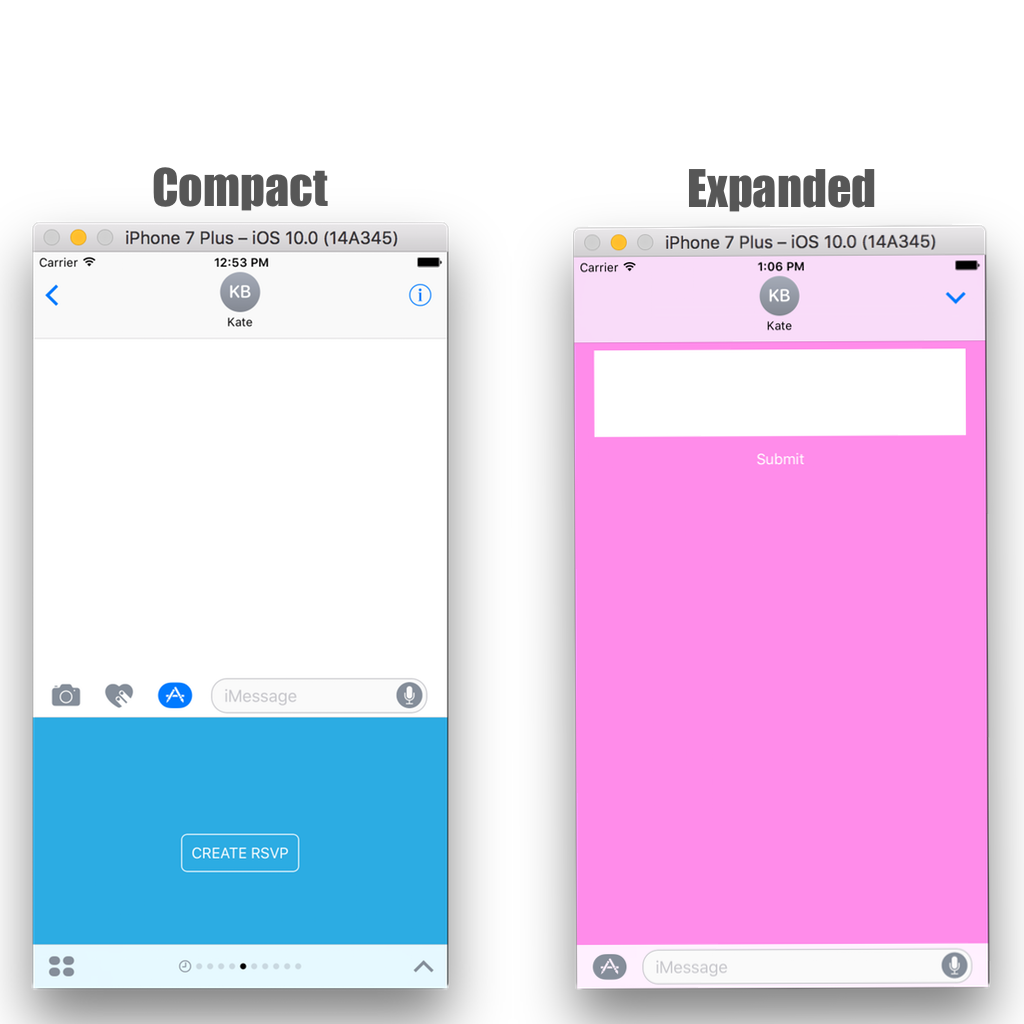
Before jumping into the technical details of the RSVP iMessages app, I'll talk about the different presentation styles of the iMessages application. The iMessages app comes with two presentation styles: compact and expanded.
- Compact: The user selects the extension in the app drawer: The Messages app launches the extension using the compact style.
- Expanded: The user selects a message in the transcript that represents one of the extension's
MSMessageobjects: The Messages app launches the extension using the expanded style.
Adding Child View Controllers
When creating iMessages applications, Xcode automatically adds a default view controller on the storyboard. This view controller inherits from MSMessagesAppViewController and serves as the root controller for the iMessages applications. In order to display a custom view controller, you need to inject the controller inside the MSMessagesAppViewController using view controller containment.
Because the RSVP app requires several screens, it's a good idea to separate the functionality of each screen into a separate view controller. This technique allows you to follow the single responsibility principles and helps you write more maintainable and readable code. Figure 7 shows the overall user interface architecture of the app.
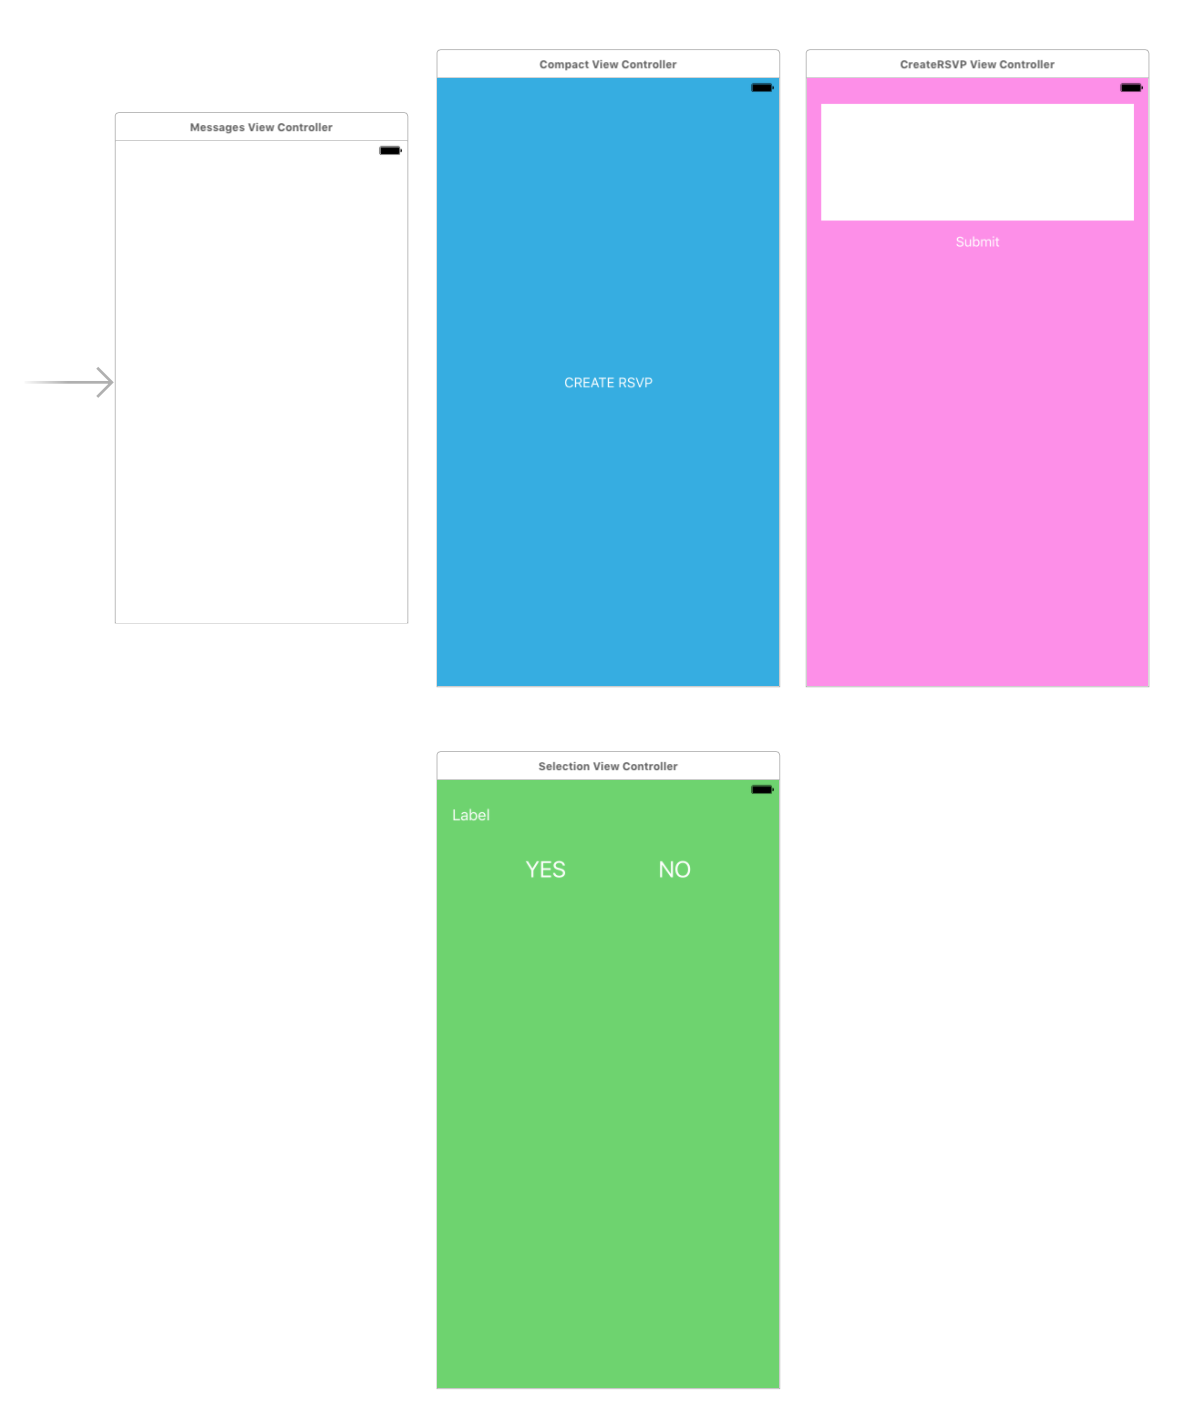
You can see that:
- The
CompactViewControlleris displayed in the compact mode when the application is launched. - The
CreateRSVPViewControllerallows the user to create a new RSVP and enter the details of the event. - The
SelectionViewControllerallows the user to respond to the RSVP request.
The first step is to add the CompactViewController to the MessagesViewController using the view controller containment techniques. I've created a custom function that's responsible for adding and removing child view controllers. Listing 1 shows the complete implementation of the presentViewController function.
Listing 1: A generic function to inject designated view controller into the MSMessagesAppViewController
private func presentViewController
(with conversation:MSConversation,
 for presentationStyle : MSMessagesAppPresentationStyle) {

    var controller :UIViewController!

        if presentationStyle == .compact {

            controller = instantiateRSVPCompactViewController()

        } else {

            controller = instantiateCreateRSVPViewController()

        }

        //Remove any existing child controllers.
        for child in childViewControllers {
            child.willMove(toParentViewController: nil)
            child.view.removeFromSuperview()
            child.removeFromParentViewController()
        }

        addChildViewController(controller)

        controller.view.frame = self.view.bounds
        controller.view.translatesAutoresizingMaskIntoConstraints = false
            self.view.addSubview(controller.view)

        controller.view.leftAnchor.constraint(equalTo:
            view.leftAnchor).isActive = true
        controller.view.rightAnchor.constraint(equalTo:
            view.rightAnchor).isActive = true
        controller.view.topAnchor.constraint(equalTo:
            view.topAnchor).isActive = true
        controller.view.bottomAnchor.constraint(equalTo:
            view.bottomAnchor).isActive = true

        controller.didMove(toParentViewController: self)
}
Depending on the presentation style, the presentViewController function injects the correct controller into the MessagesViewController. The instantiateRSVPCompactViewController and instantiateCreateRSVPViewController functions are responsible for instantiating the controllers based on their storyboard Identifiers. Listing 2 shows the instantiate functions implementation.
Listing 2: Instantiating the Child Controllers
private func instantiateCreateRSVPViewController()
    -> UIViewController {

    guard let controller = self.storyboard?.instantiateViewController
        (withIdentifier: "CreateRSVPViewController")
        as? CreateRSVPViewController else {
            fatalError("CreateRSVPViewController not found")
        }

controller.delegate = self
return controller
}

private func instantiateRSVPCompactViewController()
    -> UIViewController {

guard let controller = self.storyboard?.instantiateViewController
    (withIdentifier: "RSVPCompactViewController") as?
    RSVPCompactViewController else {
        fatalError("RSVPCompactViewController not found")
    }

controller.delegate = self
return controller
}
Run the app and you'll notice that the RSVPCompactViewController is injected into the MessagesViewController and is displayed in the compact view due to its presentation style. If you press the expand button, the presentViewController is triggered again and CreateRSVPViewController is injected into the MessagesViewController. Figure 8 shows this in action.
The communication between the child view controllers and the parent view controller is performed using protocols and delegates. The CompactRSVPViewController exposes a protocol that can be implemented by the delegate classes. The implementation of the instantiateRSVPCompactViewController function already set its delegates, and are notified when any protocol function is triggered. The protocol CompactRSVPViewController delegate defines only a single function called rsvpCompactViewControllercreateRSVP. The function doesn't take any parameters and it doesn't return any parameters. The only purpose of this delegate method is to transfer the control back to the MessagesViewController, as can be seen in the following snippet.
protocol RSVPCompactViewControllerDelegate : class {

    func rsvpCompactViewControllercreateRSVP()

}
The MessagesViewController conforms to the RSVPCompactViewControllerDelegate and provides a custom implementation for the rsvpCompactViewControllercreateRSVP function, as shown in the next snippet.
func rsvpCompactViewControllercreateRSVP() {

requestPresentationStyle(.expanded)
}
As you can see, the rsvpCompactViewControllercreateRSVP simply requests the expanded presentation style, which launches the CreateRSVPViewController. The requestPresentationStyle function invokes the didTransition function, which in turn calls the presentViewController function and selects the correct controller depending on the passed presentation style.
Customizing Messages
Once the user fills in the RSVP description, you need to communicate that to the other recipient in the form of a message. The Messages Framework provides multiple ways of sending messages. A message can be sent as a plain text message or a customizable MSMessage. The next snippet shows an approach where a plain text message is sent as an RSVP invitation.
func createRSVPViewControllerDidCreatedRSVP(rsvp: RSVP) {
    requestPresentationStyle(.compact)

    self.activeConversation?.insertText(rsvp.title,completionHandler: nil)
}
The result is shown in Figure 9.

It's pretty simple! But it also doesn't capture any enthusiasm and excitement for the party. Luckily, the MSMessages class allows you to send customized messages. Listing 3 shows the implementation of the composeMessage function, which creates a MSMessage class.
Listing 3: Function to create a message with custom layout
private func composeMessage(rsvp :RSVP) -> MSMessage {

    let message = MSMessage()
    let components = NSURLComponents()
    message.url = components.url!

    let layout = MSMessageTemplateLayout()
    layout.image = UIImage(named: "partyballoons.jpg")
    layout.caption = rsvp.title
    layout.subcaption = "Yes Count: \(rsvp.yes)"
    layout.trailingSubcaption = "No Count:\(rsvp.no)"

    message.layout = layout
    return message
}
The composeMessage function takes in an object of type RSVP class and generates and returns an instance of the MSMessage class. The MSMessageTemplateLayout is responsible for customizing the look and feel of the message. I assigned an image to the layout that serves as the background image of the message. I also changed the caption of the message through the template layout, which allowed me to show the text of the invitation. Figure 10 shows the result in action.
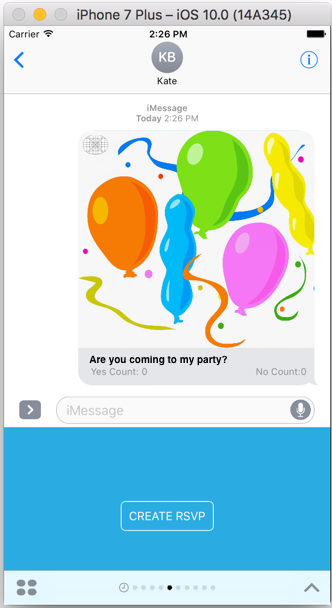
This definitely looks much better, and I'd bet that more people are going to RSVP YES for the party due to the appealing appearance of the message.
Maintaining Sessions Between Participants
In order to update the RSVP count, you need to maintain the session between the participants. This can be accomplished by using the URL property of the MSMessage class. The URL property can hold query string data that can represent the information in pairs. The next snippet shows the query string to create for the application.
message=Are%20you%20coming%20to%20my%20party&yesCount=54&noCount=3
The query string contains three pieces of information in pairs. Each pair is identified by a key and a value. Here's the breakdown of the message URL:
- message: The actual text of the invitation
- yesCount: The number of people who replied yes
- noCount: The number of people who replied no
Apple simulator doesn't provide the functionality to send group messages nor does it allow to add custom Messages accounts.
Listing 4 shows the implementation of the composeMessage function, which adds the query parameters to the message.
Listing 4: Compose Function with Sharing Data Through URL
private func composeMessage(rsvp :RSVP) -> MSMessage {

    let session = self.activeConversation?.selectedMessage?.session

    let message = MSMessage(session: session ?? MSSession())

    let components = NSURLComponents()

    components.queryItems = [URLQueryItem(name: "title", value:
        rsvp.title),URLQueryItem
        (name:"yesCount",value:"\(rsvp.yes)"),
        URLQueryItem(name:"noCount",value:"\(rsvp.no)")]

    message.url = components.url!

    let layout = MSMessageTemplateLayout()
    layout.image = UIImage(named: "partyballoons.jpg")
    layout.caption = rsvp.title
    layout.subcaption = "Yes Count: \(rsvp.yes)"
    layout.trailingSubcaption = "No Count:\(rsvp.no)"

    message.layout = layout

    return message

}
The NSURLComponents class is responsible for creating the query string in a designated format. Finally, you assign the newly generated URL to the message's URL property. Now when a message is added to the active conversation, it has the underlying query string part of the URL property. Next, you need to add a view that displays the text of the invitation and also to accept or reject the invitation.
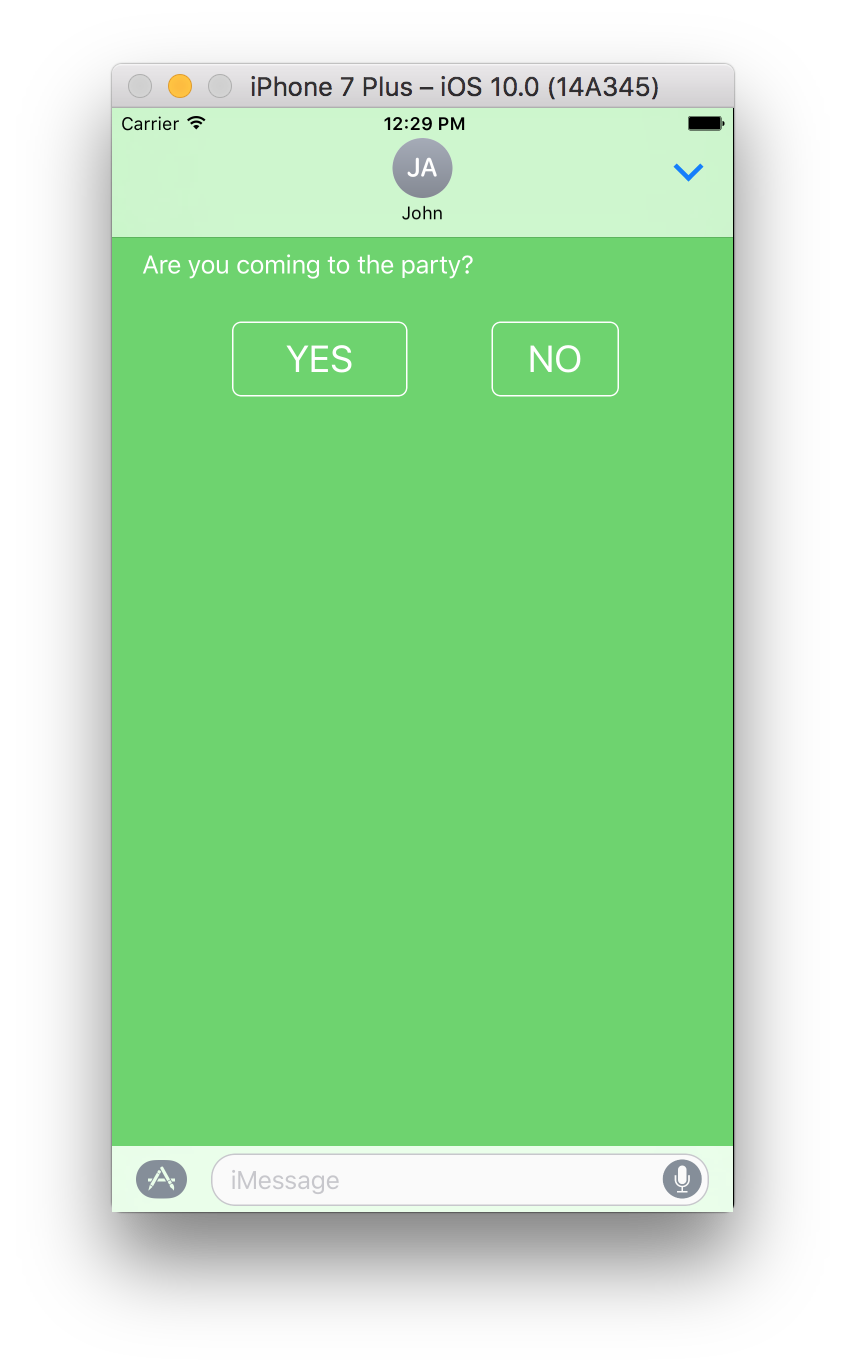
The RSVPSelectionViewController is responsible for providing the user with options to either accept or reject the invitation. The RSVPSelectionViewController consists of two buttons, one for YES and the other one for NO, as shown in Figure 11.
The RSVP title is passed to the RSVPSelectionViewController using the message's URL property, where it can be decomposed into an object and then displayed in the view controller. Finally, the user is given the opportunity to accept or reject the invitation by pressing a button. The button, when pressed, increments the yes or no count and then appends a new message to the active conversation. The result is shown in Figure 12.
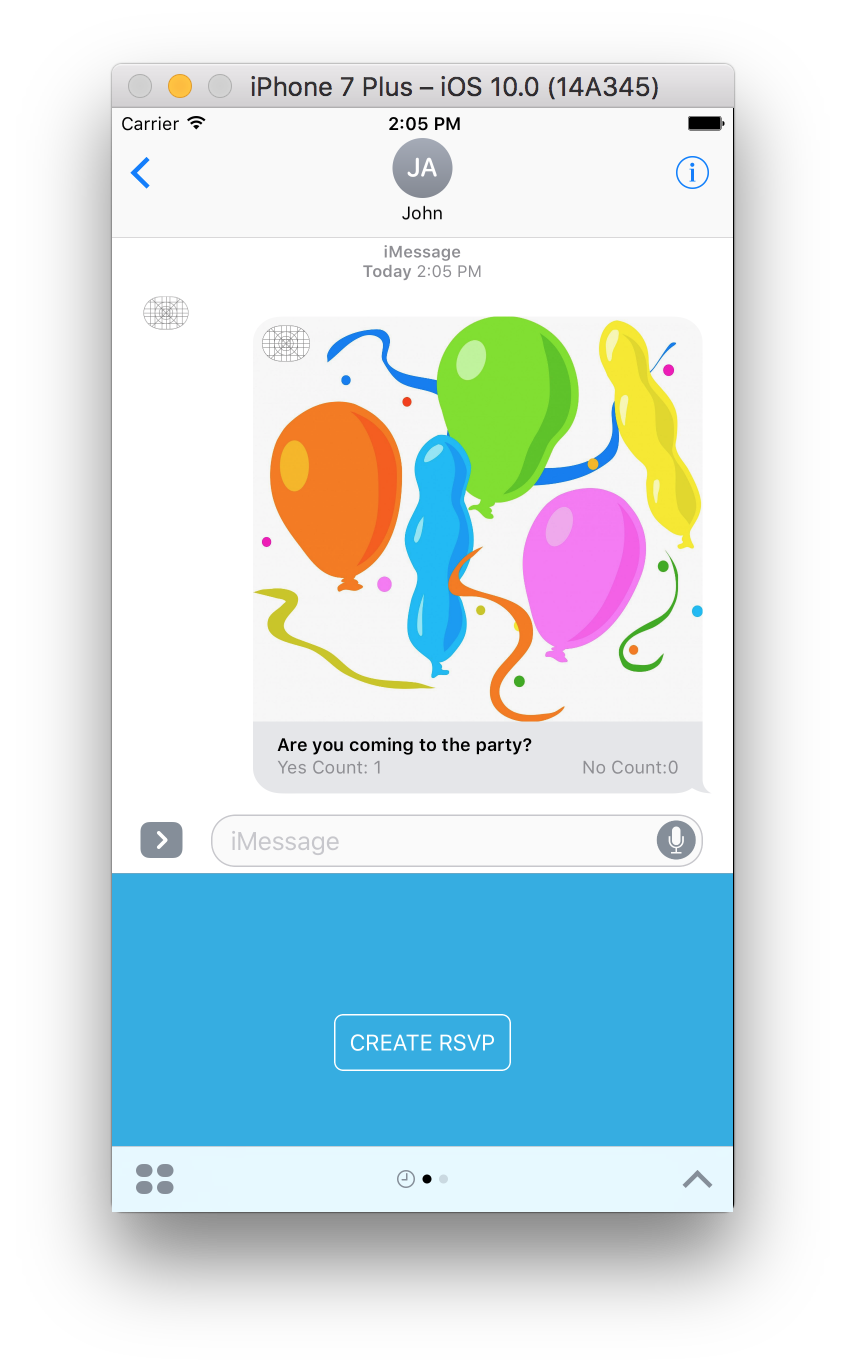
You can't modify the original message, but you can append to it by using a shared session between participants.
Conclusion
Apple's inclusion of the Messages framework has opened doors for creating a new category of applications. Apart from the stickers apps, iMessages apps have become an integral part of Apple's echo system, allowing you to create a new form of communication medium for your users. The Messages framework has allowed developers to extend the existing iOS app to include the messages capability.